Better Late than Never..

So frustrated to be running late with this post.  Go out of town and the hotel has Internet issues…Oh well 


Well, I am having Internet problems so I am hoping this goes live when the time comes!  This is my last post for my term with USArtQuest and I love the products even more now than I did when I started!  I love that anyone can order direct from them as well.  It makes getting their wonderful products no matter where you live! 


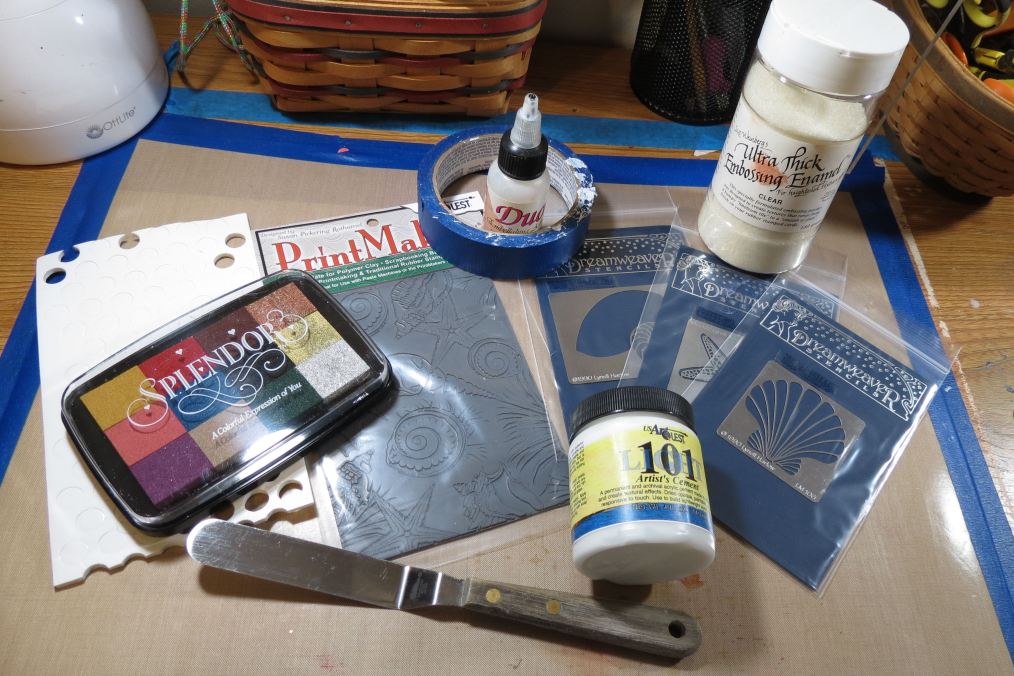
For my last post I decided to make a Greeting Card.  And these are some of the products used.

Image


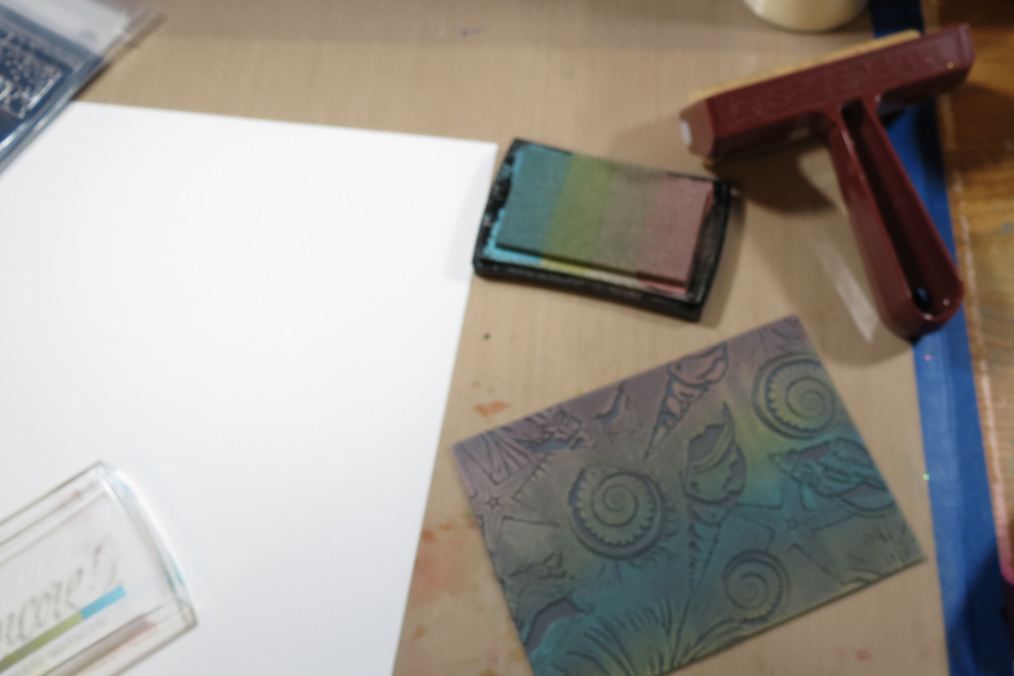
I started with the Print Maker rubber stamp of sea shells and then inked it with an Encore Pad (not shown) from Tsukineko.  I then stamped it several times on white paper.

 Image


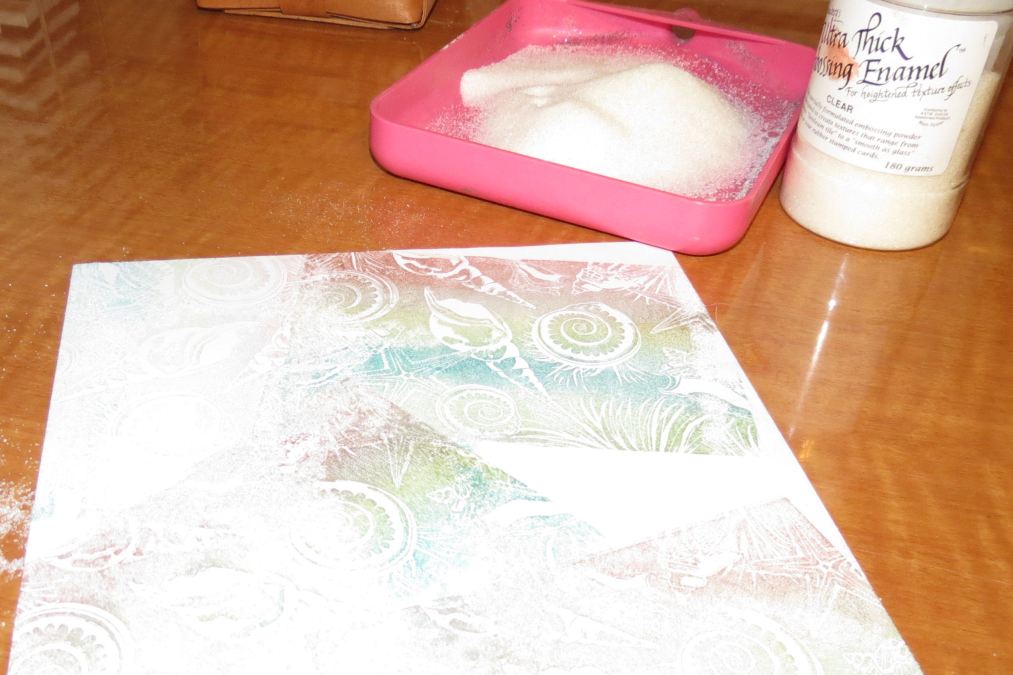
While the ink was still wet I added Ultra Thick Embossing Enamel.  This is different than embossing powder.  It has larger granules and if you are not careful when you heat your project it will blow some of the larger bits away.  For this card it was okay as I wanted texture.

Image


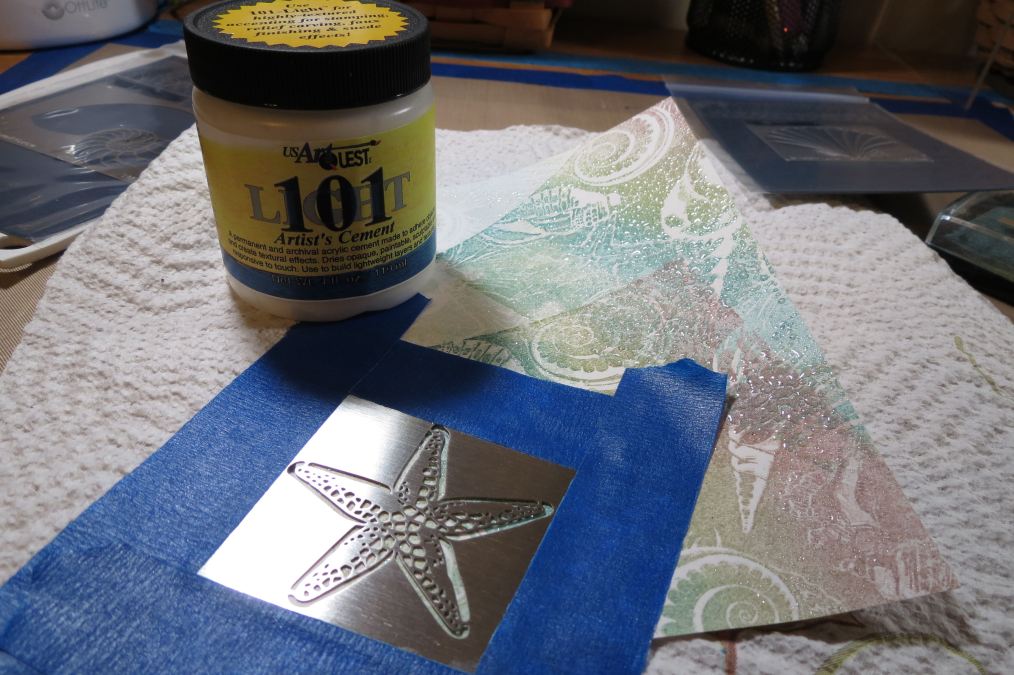
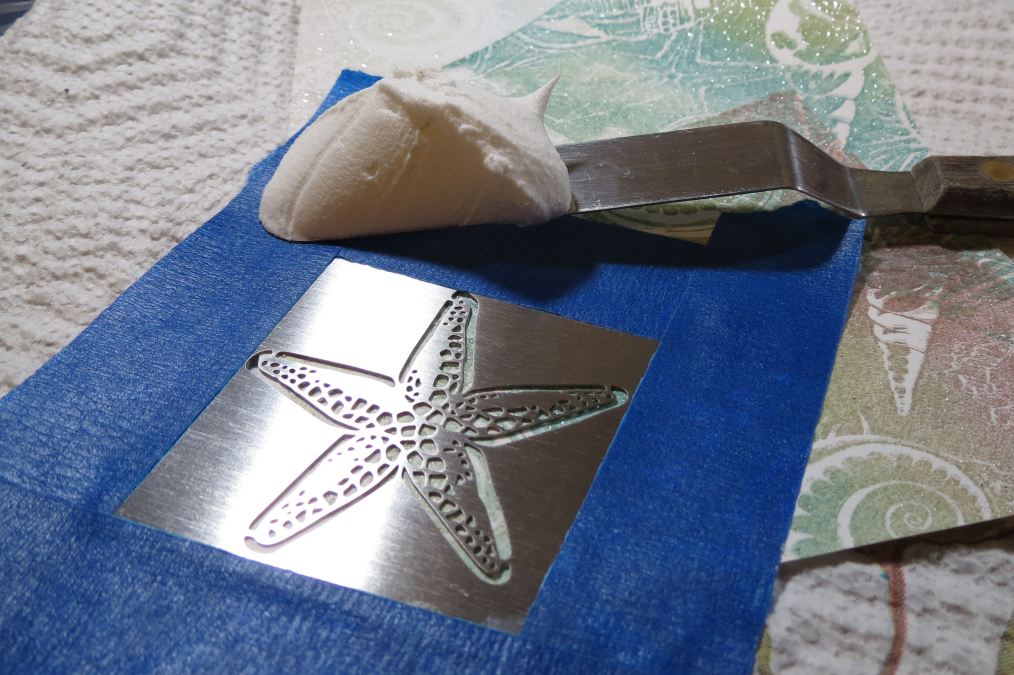
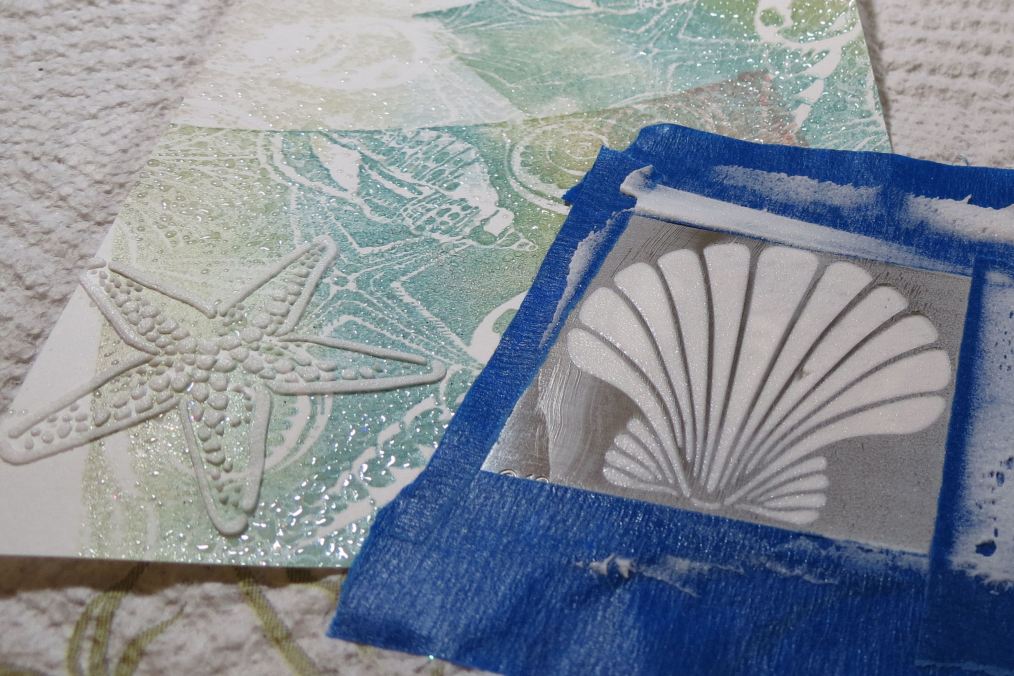
Then I used some stencils from Dreamweaver.  These are great stencils and went very well with the design of the card.  I used low tack tape to hold the stencil in place and with a palette knife spread the 101 like I was frosting a cake.

 Image

 Image

 Image

I then pull up the tape and clean the stencil and then apply my next image.  I am going to allow them to dry and then add some color to the designs.


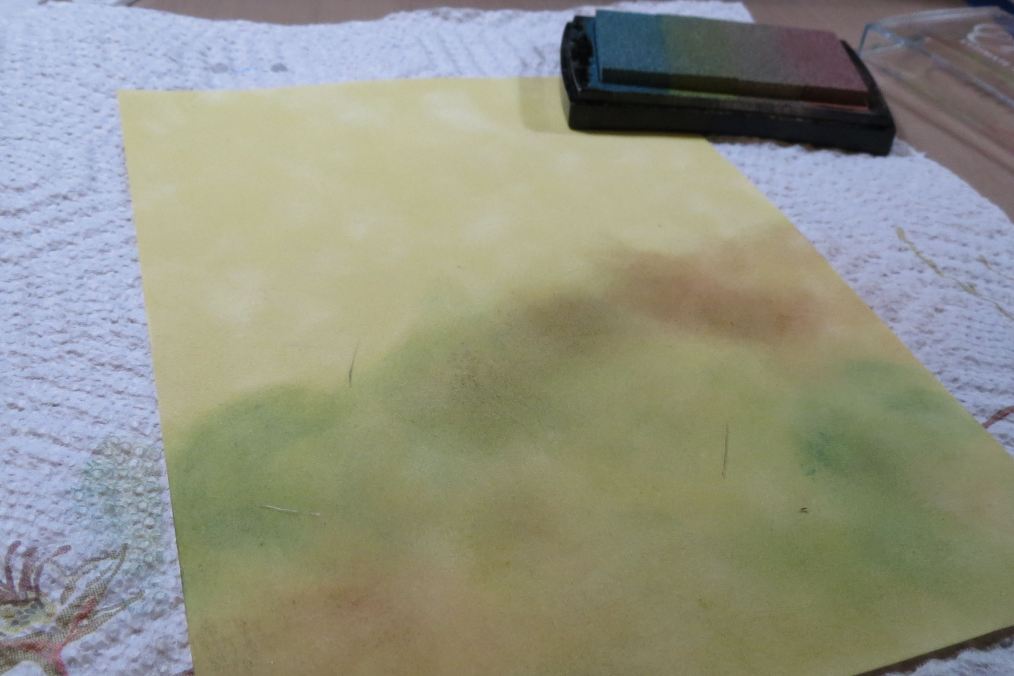
I also wanted to use a bit of yellow suede paper so I added some color with a stencil brush.  Then I used the same system to emboss the last shell.  I will cut it out for use later!

 Image


I will cut this image out and raise it up with a pop dot.

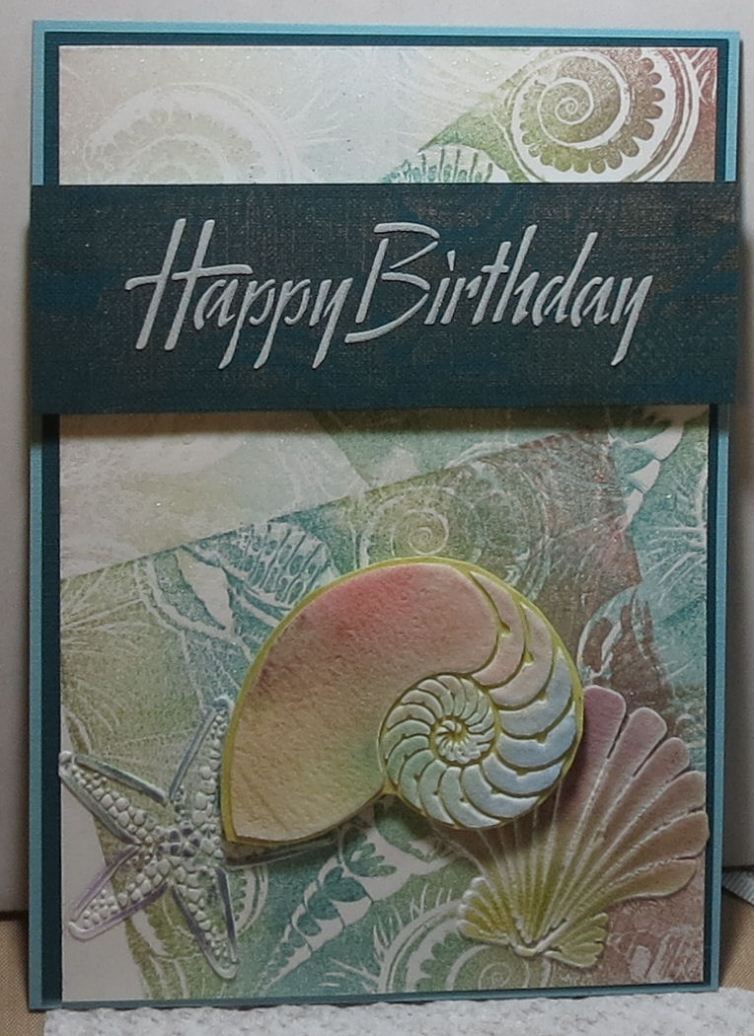
I now stamp the background image again on  card stock then I stencil the sentiment “Happy Birthday” over the top and let dry.  Now I assemble the entire card and this is what I have!

 Image

Hope you enjoyed this card!  Happy Creating!

Kristi


12 x 12 Canvas

I will be perfectly honest with you, this is not what I thought this project was going to look like when I started.  After a bit it took on a life of it’s own!

It is hanging on my living room wall right now and looks pretty cool.  I just can’t believe the MORPH!  So here is the beginning of this brain child…

I had a canvas and all this fun supplies.  I had an idea using rubber cement and the mica paints.  I thought I would do some negative space.  I had GREAT intentions!  I used some vase stencils from Dreamweaver

I got them all lined up and ready to apply the rubber cement.  First, I did not think the rubber cement would slide under the stencils as bad as it did.  I think I tried to put it on too thick. But I get ahead of myself.


You can see I have applied the rubber cement and am letting it set.  I then will remove the stencils and just leave the rubber cement.  In the end this will act as a resist.


I also added some swirls around the edges thinking it would make it interesting.  Next I start putting on the wash of Mica Paints from USArtQuest!  These are so pretty and have such shimmer and shine.

I am just brushing a mix of color over the entire canvas. 

I just kept adding color and finally set it aside to dry.  I was so happy that it dried rather quickly.  I do not always have the most patients when it comes to this sort of thing.


I decided it was not yet enough color so added more and then I wanted to add in some white.  I really gave a lovely shimmer.

Next I took the gum eraser and started to remove the now dry rubber cement.  I was pleased with how easily it did come off the canvas.  This is when I knew just how poorly I had done with the rubber cement!


So here you can see where the White lines are and I had added some color back over the vase area.  Honestly, at this point I was a little discouraged as this was not looking as I wanted.  So I tried to co some napkin collage with PPA.  Then I decided to cover the napkin with clear embossing paste.


Little did I know it was not wanting to dry!  I did add some of the Mini Prills to the wet paste and started to collage some other areas of the canvas.

I did like the flowers over the top of the vases.  I still was not happy with the way the vases looked.  So I went back over the side vases with Copper Paste.


By this point I decided I did not like the white swirls so I just stated layering the mica paint.  I stopped taking step by step photos as I was getting more and more frustrated, then all of the sudden I started to kind of like this.  I added some borders and butterflies from K&Co.  Then I thought it needed some texture so I threw on some mica flakes in pearl and red.  I used PPA to adhere them to the canvas.  I was still not happy with the center vase so I did a no no and heated the vase with my heat tool.  It made a bubble so I peeled back the bubble and added some interest and texture.  I used a fun metal accent from Advantus and another butterfly embellishment. 


Honestly, at this point I just added more paint, glitter, more stickers and just let the project run away as it wanted.  I finally finished the last touch in the upper right corner with a pretty flower.  Here is the finished project again.

And now some other shots from a different perspective.


This ended up being very collaged, layered, glued and more.  Hope you all like the finished product although not what I set out to do, it is a nice piece.  The more I look at it the more it grows on me. 


Supplies used:

12 X 12 Canvas*

Mica Paints Star Gazers

Mica Flakes

Perfect Pigment Paints

Napkins

PPA

Dreamweaver Stencils*

Embossing Paste *

Rubber cement*

Mini Prills

Advantus Flower

K&Co stickers and boarder*

A small amount of Diamond Glaze*

Crystal Effects

USArtQuest paint brushes


*items NOT from USArtQuest


Thank you for joining me today.  Don’t forget to join all the USArtQuest team for a blog hop featuring Mini Prills March 12th!  It will be GREAT fun!


Happy Creating


Kristi

12 X 12 Canvas

I will be perfectly honest with you, this is not what I thought this project was going to look like when I started.  After a bit it took on a life of it’s own!

It is hanging on my living room wall right now and looks pretty cool.  I just can’t believe the MORPH!  So here is the beginning of this brain child…

I had a canvas and all this fun supplies.  I had an idea using rubber cement and the mica paints.  I thought I would do some negative space.  I had GREAT intentions!  I used some vase stencils from Dreamweaver.

I got them all lined up and ready to apply the rubber cement.  First, I did not think the rubber cement would slide under the stencils as bad as it did.  I think I tried to put it on too thick. But I get ahead of myself.


You can see I have applied the rubber cement and am letting it set.  I then will remove the stencils and just leave the rubber cement.  In the end this will act as a resist.


I also added some swirls around the edges thinking it would make it interesting.  Next I start putting on the wash of Mica Paints from USArtQuest!  These are so pretty and have such shimmer and shine.

I am just brushing a mix of color over the entire canvas.

I just kept adding color and finally set it aside to dry.  I was so happy that it dried rather quickly.  I do not always have the most patients when it comes to this sort of thing.


I decided it was not yet enough color so added more and then I wanted to add in some white.  I really gave a lovely shimmer.

Next I took the gum eraser and started to remove the now dry rubber cement.  I was pleased with how easily it did come off the canvas.  This is when I knew just how poorly I had done with the rubber cement!


So here you can see where the White lines are and I had added some color back over the vase area.  Honestly, at this point I was a little discouraged as this was not looking as I wanted.  So I tried to co some napkin collage with PPA.  Then I decided to cover the napkin with clear embossing paste.


Little did I know it was not wanting to dry!  I did add some of the Mini Prills to the wet paste and started to collage some other areas of the canvas.

I did like the flowers over the top of the vases.  I still was not happy with the way the vases looked.  So I went back over the side vases with Copper Paste.


By this point I decided I did not like the white swirls so I just stated layering the mica paint.  I stopped taking step by step photos as I was getting more and more frustrated, then all of the sudden I started to kind of like this.  I added some borders and butterflies from K&Co.  Then I thought it needed some texture so I threw on some mica flakes in pearl and red.  I used PPA to adhere them to the canvas.  I was still not happy with the center vase so I did a no no and heated the vase with my heat tool.  It made a bubble so I peeled back the bubble and added some interest and texture.  I used a fun metal accent from Advantus and another butterfly embellishment.


Honestly, at this point I just added more paint, glitter, more stickers and just let the project run away as it wanted.  I finally finished the last touch in the upper right corner with a pretty flower.  Here is the finished project again.

And now some other shots from a different perspective.


This ended up being very collaged, layered, glued and more.  Hope you all like the finished product although not what I set out to do, it is a nice piece.  The more I look at it the more it grows on me.


Supplies used:

12 X 12 Canvas*

Mica Paints Star Gazers

Mica Flakes

Perfect Pigment Paints

Napkins

PPA

Dreamweaver Stencils*

Embossing Paste *

Rubber cement*

Mini Prills

Advantus Flower

K&Co stickers and boarder*

A small amount of Diamond Glaze*

Crystal Effects

USArtQuest paint brushes


*items NOT from USArtQuest


Thank you for joining me today.  Don’t forget to join all the USArtQuest team for a blog hop featuring Mini Prills March 12th!  It will be GREAT fun!


Happy Creating


Kristi

Victorian Fun With Napkins and PRILLS

I did something totally NOT me!  I was so excited to get my napkins from USArtQuest!  I have been inspired by Joe Rotella, fellow Design Team member and dear friend.  So lets get started!

I started with my letter “K” for Kristi.  I have had this chipboard piece for a bit and decided to use it for this project.  You can see the stencil, Napkin set, Prills and Perfect Pigment Paints!  Look how pretty the napkins come bundled!  So cool!

First I covered the letter with white paint. I just squeezed out a little on the letter and spread it out.  This cut down on waste. I could add more if needed, but no waste on a palette.

Once this was dry I separated the layers of the napkin so I could use the colorful pretty layer only!  I then applied PPA to the K.  I wanted a continuous design so I just unfolded the napkin and laid it on the K.  I loved how the napkin just grabbed onto the PPA!

Next I cut some slits in the napkin so I could wrap the edges around the sides.  I applied PPA over the top of the napkin once in place.  I just worked until all areas were laying nicely.  While still damp I sprinkled with Crystal Effects.  This is super fine glitter that came with the napkin kit!  I also added a heavy layer of PPA on the straight edge of the K and applied Prills!

As you can see I added the stenciled image with white 101 Heavy.  I wanted some of the Prills under the design so it was a little tricky getting the image on the K, but was very pleased with the extra texture.  I then added more Prills to the wet paste.   Next I am going to add a pretty flower!

I really wanted to give this a Victorian feel so next I added some really pretty ribbon with ribbon flowers attached from Offray!

After looking at this for a bit I added a satin flower to the top of each stem of the stenciled image.

After this was all dry I still decided it needed more of something.  MORE PRILLS!

So this is my finished project.  I had a lot of fun and stepped into a Victorian style, colors out of the norm for me and just had fun.  I loved using the napkin as the base for the creation.  I can’t wait to collage with the napkins!!  I love the products from USArtQuest and really love the new PRILLS!

Happy Creating,

Kristi

Hello world!

Welcome to WordPress.com. After you read this, you should delete and write your own post, with a new title above. Or hit Add New on the left (of the admin dashboard) to start a fresh post.

Here are some suggestions for your first post.

  1. You can find new ideas for what to blog about by reading the Daily Post.
  2. Add PressThis to your browser. It creates a new blog post for you about any interesting  page you read on the web.
  3. Make some changes to this page, and then hit preview on the right. You can always preview any post or edit it before you share it to the world.